Open a new image, 200 x 480, transparent background.
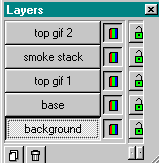
Open the Layer Palette and add 4 more layers.
Name each layer to look like this
Now you need to open all your graphics that you saved in PSP form.
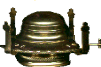
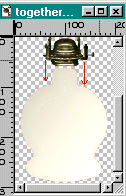
Copy and paste the base first. I do this as new selection as I already have my layer palette set. Then I go to Select and none. Position the base at the bottom of your image.
Next is your top gif 1 image. Position it on the top of the base as you would screw it on to an Oil Lamp.
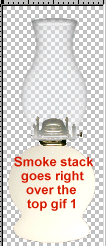
Next is your Smoke Stack. You can go right over the top gif 1 image, you will see why in the next step.
Now take your Top gif 2 and line it up with Top gif 1.
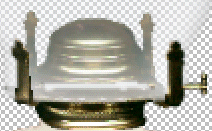
As you can see this goes over the smoke stack.
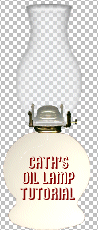
You can now move everything around and resize what needs to be.
When you have everything the way you like it, Press SHIFT+D
to bring up a new picture and save.
I always save the orignal in PSP in case I need it, like to write this tutorial.
And there you have it

EMAIL US HERE
We appreciate hearing from you, how you like or dislike this tutorial.
You are visitor number

since January 29, 2001
Today is
View Our Guestbook
 Sign Our Guestbook
Back to Blue & Shadows Mom Homepage
My Front Page

|