|
1. Open New Image, 400 x 400 , transparent background 2. Open Layer Palette and add 3 more layers 3. Name each layer, Background, Top, Middle, Bottom Your Layer Palette should look like this now. 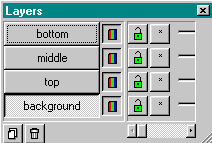
|
|
4. Activate "Top" layer Use Shapes tool and start at the top of the image. Draw a circle with the settings Shape = Elipse Outlined = Width = 1 Antialias is unchecked. Draw a SMALL circle for the top of the base. Activate Middle Layer, and with the same settings on the Shapes Tool draw a bigger circle for the middle of the base. Use the Deformation Tool to form the Top and Middle together. You will still have whole circles. you should look like this. 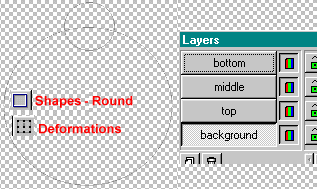 Now activate the Bottom Layer With the Shapes Tool, settings: Rectangle Outlined, Width = 1 Antialias unchecked 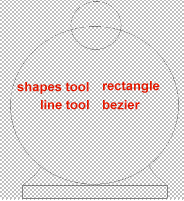
Draw a rectangle box under the middle. Now with the Line tool, set at Bezier, draw lines to join the Middle and the Rectangle box. You will have to play a little at this. It's time to erase all the unwanted lines with the Eraser tool. When you are finished, you should look pretty much like this 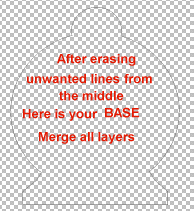
Turn off the Background layer and Merge the rest, visible. Activate the Background layer and Paint your base. 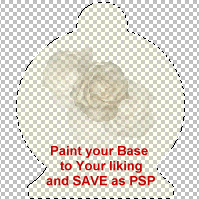
Merge ALL LAYERS visible and there you have your completed Oil Lamp Base. Let's turn the Page and put it all together. 
|